Whether you’ve decided to breastfeed or bottle-feed with expressed milk or infant formula, you should always ensure that you are both clean and sterilize all types of new-born feeding equipment. This includes bottles and teats, any anti-colic devices, breast pumps, spoons and syringes used for administering medicines.
New-born babies have vulnerable immune systems, meaning they’re far more susceptible to everyday germs and bacteria that are usually harmless to adults. These can cause illness in young children – vomiting, diarrhoea, and oral thrush is particularly common. Sterilizing baby bottles and other feeding equipment reduces the likelihood of your baby coming into contact with these germs and therefore, lowers their risk of illness.
Check your baby bottles, teats, pumps, and other feeding apparatus carefully for any damage before sterilizing them, as small cracks and tears can foster bacteria. Throw any damaged items away to be certain you are giving your baby sterile feeding equipment.
What Kind of Baby Sterilizer Equipment is Available?
Many new parents worry about how to sterilize baby bottles, but it’s actually very simple. You can choose to purchase a dedicated baby bottle sterilizer or use objects and items that you already have at home for the same purpose. Just remember, before using any form of baby bottle sterilizer you need to thoroughly clean the equipment using warm, soapy water – a regular dishwashing soap such as a Vim bar will be fine for this, but it’s also worth buying a soft-bristled bottle brush that will prevent damage to teats and pump tubes.
Here are a few ways for sterilizing baby bottles and other feeding equipment:
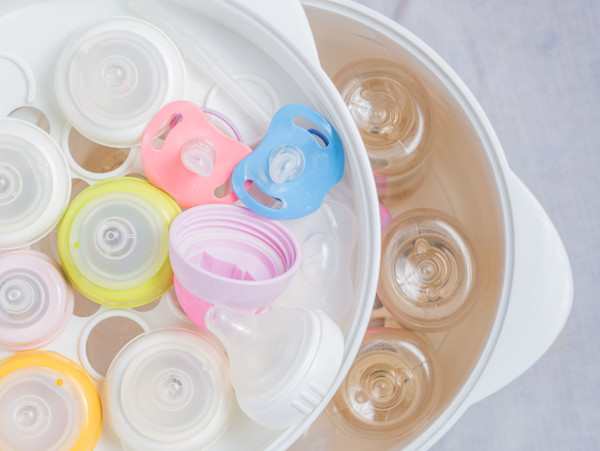
Baby Sterilizer- Electric Steamer
Electric steamers can be purchased from any baby store and are one of the most popular methods of sterilizing baby bottles. They often hold six bottles at a time and can take a little time, as five minutes to fully sterilize equipment.
Step 1:
Fill the steamer with a small amount of cold water. Read your product’s instructions for the exact amount, but as general rule steamers that hold 6 bottles or the equivalent typically need around 200ml.
Step 2:
Place the clean feeding equipment into the baby bottle sterilizer. Remember that the water and heating elements are at the bottom of the device and the steam rises. This means that items should be placed with their openings facing the bottom: teats should be the right way up, and the bottles should be placed upside down.
Step 3:
Replace the lid of the sterilizer ensuring you have a tight seal all the way around – Even if there are small gaps, the steam will simply escape.
Step 4:
Turn the steamer on and leave for the instructed time – usually anywhere from 5 to 10 minutes. Do not attempt to remove bottles immediately, as they will be very hot.
Step 5:
If the lid has not been removed, bottles can be left in the steamer for up to 6 hours. Once the lid has been opened, however, bottles need to be assembled rapidly, with the lids on to prevent the insides from becoming contaminated.
Baby Sterilizer- Microwave Steamer
A microwave steamer is very similar to an electric steamer, except it uses the common kitchen appliance to heat the water and create a steamy environment. Use this in the same way as an electric steamer, placing the bottles in with their openings facing down, and ensuring bottles are assembled as soon as they have been exposed to the air.
Baby Sterilizer- Dishwasher
If you have a dishwasher, then this can be used as both a cleaner and a baby sterilizer. It’s important, however, that you ensure that the feeding equipment you have is suitable for dishwashing (use the top shelf if necessary), and you will also need to use a very hot program of over 80 degrees. Many new parents find the dishwashing method to be too much hassle, as it tends to damage bottles and equipment quicker than some other methods, and there is a chance of teats flipping over with the pressure of the water, which means they accumulate dirty water and need to be washed and sterilized again.
Baby Sterilizer- Boiling
It’s also possible to sterilize baby bottles using a regular pan on the stove. You don’t need any special equipment, but teats and pump tubes can become damaged quicker using this technique:
Step 1:
Fill a large pan with cold water and place the feeding equipment in, ensuring that all the items are completely covered by the water and they are no air traps.
Step 2:
Use a heavy plate or bowl to place on top of the pan almost in contact with the water. This will keep all the items below the surface of the water.
Step 3:
Bring the pan of water to a rolling boil and continue to do so for 10 minutes.
Step 4:
If you leave the lid on, bottles can stay in the pan for up to 6 hours, though it’s better to assemble them once they’ve cooled enough. Assembled bottles can typically be left for 24 hours before needing to be re-sterilized.
Baby Sterilizer- Cold Sterilisation
Cold sterilization is perfect for parents who frequently need to use a baby bottle Sterilizer on the move, or while out and about without access to electricity or boiling water.
Step 1:
Use a clean plastic tub or bucket, a sterilizing solution or tablet (available from supermarkets) can be added to water, and the baby items placed in.
Step 2:
Ensure all the items stay under the water for at least 30 minutes – preferably longer.
Step 3:
The water and solution can be reused as needed but should be changed after 24 hours.
How Do I Choose a Baby Bottle Sterilizer?
Your choice of baby bottle sterilizer will really depend on your individual circumstances and preferences. Parents that have the time and are looking for inexpensive options might go with boiling on the hob, while those with little time to spare may prefer a quick electric or microwave steamer. Cold sterilisation is equally as good, but many prefer to keep their sterilising methods natural and prefer to avoid sterilising tablets and solutions.
How Long Should I Keep Sterilising Baby Bottles for?
You’ll be glad to hear that once your baby reaches 12 months of age, their immune system is usually strong enough to fight off most everyday germs and bacteria, so you can stop sterilizing baby equipment at around the one-year mark. It’s still a good idea to continue to wash bottles and other equipment thoroughly and do so immediately after use, when the milk or formula is still fresh, as it’s much harder to get items properly clean once any liquids have dried.
Key Steps:
- 1
Sterilize baby bottles after every use to protect your baby’s vulnerable immune system.
- 2
Wash any equipment thoroughly before you begin the sterilization process.
- 3
Bottle sterilization can be hassle-free with the right method for your lifestyle.